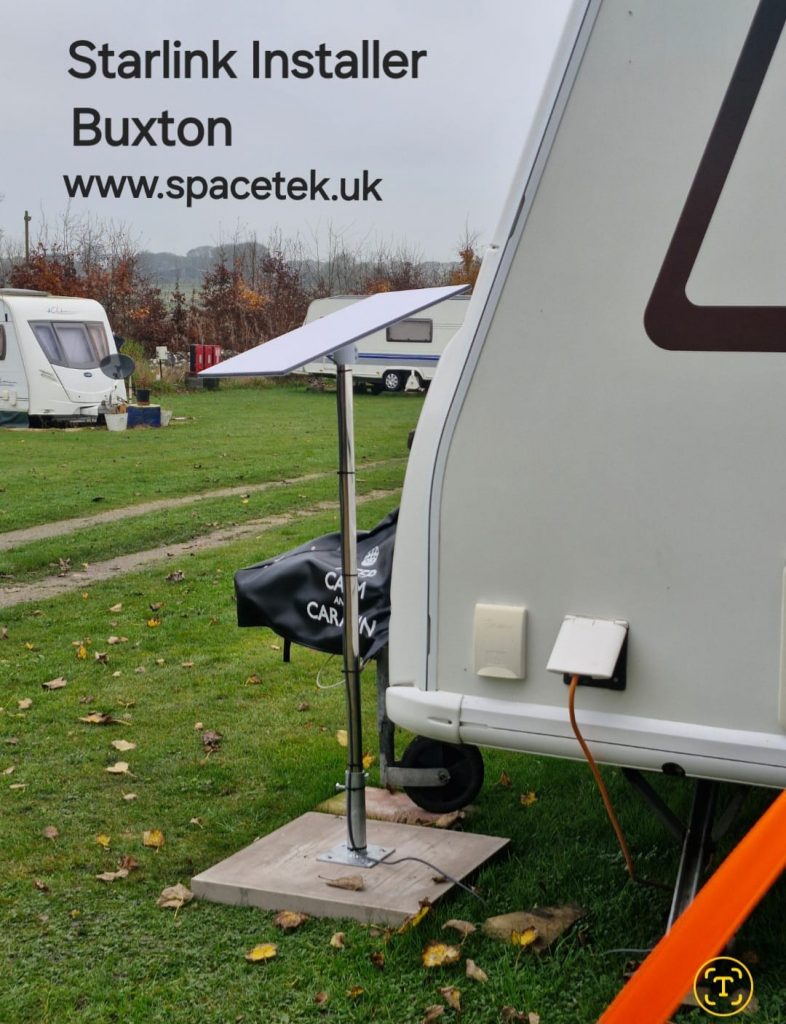
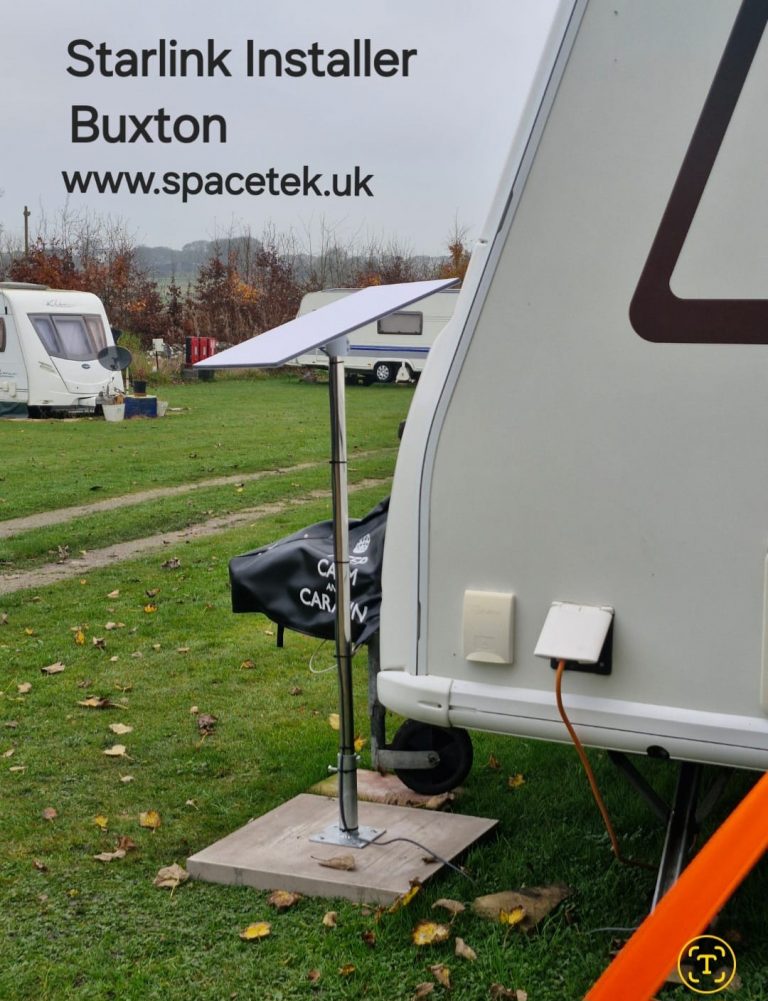
Starlink for caravans in Buxton needs a setup routine that works when you arrive, while you occupy the pitch and when you pack away. SpaceTek’s archive photograph below shows a rectangular dish on a separate pole beside a caravan. It is a useful example of a pitched installation, with different practical considerations from a dish permanently attached to a house.
Before arrival: confirm what the pitch allows
Ask the site operator whether a separate dish and support are allowed, where they may stand and whether equipment must be removed when the caravan is unoccupied. Include awnings, neighbouring pitches and access routes in the conversation. A convenient patch of grass may be part of a shared route or needed by maintenance staff.
Identify your exact dish, router and power equipment before discussing a mount. Check your current service plan with Starlink for the locations and type of use you intend. Using equipment on a stationary pitch and using it while a vehicle moves are different requirements; the arrangement in this photograph should be treated as a stationary-pitch example.
On arrival: assess the occupied pitch
Look at the space as you will actually use it. An awning, open storage hatch or neighbouring vehicle can change the available area. Compare possible dish positions with the Starlink app while keeping people and vehicles clear of the equipment.
Hedges and trees may look different from an older photograph or an out-of-season visit. Do not assume a pole height from another pitch will resolve an obstruction at yours. Use Starlink’s pre-installation obstruction guidance for the actual kit and seek help where the proposed position cannot be assessed safely.
Agree the complete support and cable arrangement
The archive image shows a pole supported at ground level. A photograph does not specify the stability, anchoring or exposure requirements for your own setup. Have the complete assembly assessed, including what happens in changing weather and how it is secured when unattended.
Plan the route from the dish to the caravan without crossing a walkway or trapping a cable in a door. Use components appropriate to the equipment and the conditions; ask a competent installer to assess power arrangements rather than improvising adapters. Keep connectors protected and avoid placing the router or power equipment where water can collect.
While pitched: make the routine easy to repeat
Keep a short equipment list with the caravan: dish, support, correct cables, router and power accessories. Record the agreed location and route, and check for visible movement or damage from a safe position. If the system stops working, begin with the app message and the equipment’s power state rather than repeatedly moving the dish without a reason.
Check the connection where you sit inside the caravan. Outdoor service reception and indoor Wi-Fi are separate parts of the experience, so include the living area and any permitted awning use in the plan.
Before departure: close down and account for every part
Follow the shutdown and packing instructions for the exact model. Remove any equipment intended only for use while parked, protect connectors and check that the cable route is clear before moving the caravan. Store the support so it cannot damage the dish or other equipment in transit.
For a broader explanation of leisure installations, see our caravan and motorhome Starlink guide. If the property is a fixed holiday let instead, the Buxton guest Wi-Fi guide covers a different handover and support routine.
Ask about a Starlink setup for your Buxton caravan pitch or call Bob on 07802 410 222. SpaceTek is an independent installation business; your Starlink subscription is arranged separately.
Plan your satellite internet installation
Send your postcode, property type and any known Wi-Fi requirements. SpaceTek UK will review the site information and explain the practical next step.